Archive for March, 2007

First experiments with sodium alginate

Friday, March 30th, 2007

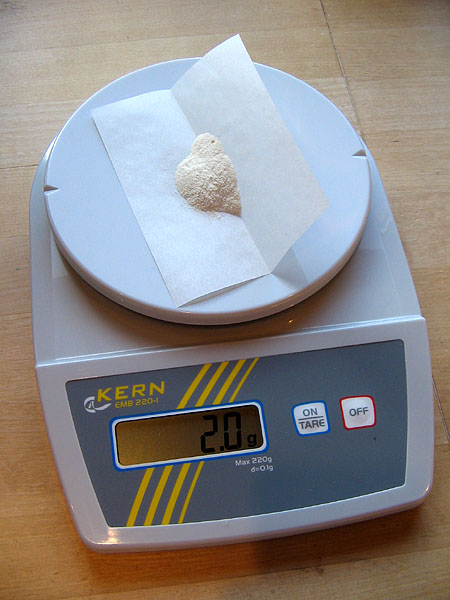
Here’s some pictures and a video of my first experiments with sodium alginate and spherification. I used sodium alginate from the Texturas series and calcium chloride from a drug store. Needless to say, I’m very fascinated by the texture and the whole process. I have blogged about the chemistry behind previously.

Materials used:
2.0 g sodium alginate
200 g water (with low calcium content!)
50 g blueberry syrup

2.5 g calcium chloride
500 g water

Procedure:
2 g sodium alginate and 200 g water were mixed vigourously in blender. The mixture was then left to stand for some hours to get rid of the air bubbles. 50 g blueberry syrup was then added to the sodium alginate solution. A calcium chloride bath was prepared by dissolving 2.5 g calcium chloride in 500 g water. The sodium alginate/blueberry mixture was dripped into the calcium chloride bath using a plastic syringe with a steel cannula. After 1-3 min the pearls were removed and rinsed with water.

More detailed procedure with pictures and video:
I had to obtain a scale with a 0.1 g accuracy to weigh out 2.0 g of sodium alginate (my first experiments using a normal kitchen scale failed). The model I got cost about $100 and is inteded for school laboratories. Amazon provides several scales with this accuracy.

alginate-1.jpg

I used a blender to dissolve sodium alginate in water. This incorporates a lot of air in the mixture which we don’t want. It could possibly be avoided by using an immersion blender/mixer. However, I just left the alginate solution on the bench and after 3-4 hours the air bubbles had all escaped from the solution.

alginate-2.jpg

Plastic syringes and cannulas can be obtained from your local drug store or pharmacist. I found it was easier to produce evenly sized drops with a sharp cannula (CAREFULL!) than with just the plastic tip of the syringe. This of course depends on the viscosity of the solution. By thickening (with xanthan for instance) you can produce larger drops.

alginate-6.jpg

After 1-3 min the spheres were removed from the calcium chloride solution and rinsed with clean water. I dried the spheres carefully using a kitchen towel or paper.

alginate-7.jpg

alginate-3.jpg

Definitely looks like caviar when presented on a spoon like this!

alginate-4.jpg

Larger spheres were made by filling a small measuring spoon with the alginate mixture (I used a syringe for this so the outsides of the spoon would not be covered with alginate solution) and carefully emptied it into the calcium chloride bath. It takes some trial and error to achieve good results.

alginate-5.jpg

The spheres are suprisingly robust and can be handled without rupturing.

alginate-8.jpg

If cut with a knife, the spheres rupture and the liquid contents flows out.

alginate-9.jpg

The small spheres didn’t taste much, so I could have added more blueberry syrup. The large spheres however had a nice taste. The surprise element when they rupture in your mouth is very nice!

DJ for your nose: Aroma jockey Odo7

Friday, March 30th, 2007

odo7.jpg

Erich Berghammer, also known as Odo7 [homepage, myspace] is an aroma jockey or AJ for short. He blows scents over his audience with huge fans and has stocked up a pantry with exotic spices, roots, leafs, oils, extracts and herbs. The smells are vaporized using hot water. This video from Roskilde gives you an idea of the set up (but no smells unfortunately).

From what I can see from his webpage Odo7 has been AJ’ing at clubs, parties, concerts, fashion shows, movie theaters and product presentations. But why hasn’t Odo7 been invited to a restaurant yet? Considering the fact that taste (as used in everyday terms) is 20% taste and 80% smell I could imagine some very interesting eating experiences with an AJ present. Think of it as a way of adding aroma to your food!

I wonder what smells you would use with the different dishes? Perhaps recreate the smell of sea for the starters (seafood). Then the smell of pine, moss and wood for the main dish (wild boar, elk or reindeer) and finish up with orange blossom for the dessert (strawberries).

The two last pairings are based on something I recall from the last International workshop on molecular gastronomy in Erice in 2004. Hervé This mentioned that strawberries combined with orange blossom extract, lemon and sugar are reminiscent of wild strawberries! At the same meeting Jack Lang suggested that branches of pine or juniper be placed around the rim of a large serving plate in front of each person. To speed up aroma extraction and vaporization one would pour hot water over the branches and then serve the food (dark meat/wild game) on a smaller plate placed between the branches. This brings us right back to the flavour pairing principle discussed earlier. But now - instead of combining two foods - we can combine a food ingredient or a dish with the appropriate aromas.

Perhaps at a restaurant experience in the not to distant future you could expect not only a waiter and a sommelier to come to your table, but also an aroma jockey!

I should also mention that the idea of using essential oils in cooking explored in great detail in the book “Aroma: The Magic of Essential Oils in Foods and Fragrance”. I justed received a copy and haven’t had much time to look at it. The fact that recipes for food and bath foam can be found on the same page might be disturbing for some, but I like the whole concept - simply because it takes the science of taste, eh.. aroma, seriously!

TGIF: Fed up with foam?

Thursday, March 29th, 2007

When many people hear molecular gastronomy, they think of culinary foams, originally introduced by Ferran Adria at El Bulli. In case you’re fed up with the foams, here’s a T-shirt to express your feelings:

foam-tshirt.jpg

Personally, I can’t even say I’ve taste any of these foams yet… Guess I’ll wait a little with the T-shirt then ;)

[Thanks to Chef John over at foodwishes]

Practical molecular gastronomy, part 4

Saturday, March 17th, 2007


(Photo by vintage_patrisha at flickr.com)

4. Learn how to control the texture of food

Taste and flavour normally get more attention when food is discussed, but the texture of food is equally important and our tongue is very sensitive, not only to taste and temperature, but also to the texture of food. The texture of food determines it’s mouthfeel and it is related to many physical properties of the food. Wikipedia lists the following aspects of mouthfeel (click to see the full description of each aspect) which can be useful when analyzing food:

Adhesiveness, Bounce/Springiness, Chewiness, Coarseness, Cohesiveness, Denseness, Dryness, Fracturability, Graininess, Gumminess, Hardness, Heaviness, Moisture absorption, Moisture release, Mouthcoating, Roughness, Slipperiness, Smoothness, Uniformity, Uniformity of chew, Uniformity of bite, Viscosity, Wetness

I will barely scratch the surface of how texture can be controlled by highlighting a couple of topics and point you to further resources. Hopefully it will spark your interest and give some new ideas for you to play with in the kitchen. Those interested in a comprehensive review of food texture are referred to the CRC handbooks on food texture (volume 1: semi-solid foods, volume 2: solid foods).

What determines the texture of food?
Put very simple, it’s the relative amounts of air, liquid and solids that determines the texture of food. This is complicated by the fact that liquids have different viscosities. Furthermore the air, liquid and solid ratio is not necessarily constant. A liquid can solidify or evaporate, solids can melt or dissolve, and air bubbles can escape during cooking or storage. An elegant but quite abstract way of describing the complicated mixtures of air, liquids and solids found in food, is to use the CDS formalism (CDS = complex disperse systems), introduced by Hervé This.


(Photo by Subspace at flickr.com)

How can texture be controlled and changed?
Texture can be controlled by temperature, pH, air/liquid/solid ratio, osmosis, hydrocolloids and emulsifiers - to mention a few. Here’s some examples:

  • Heating induces a change in the structure of proteins referred to as coagulation or denaturation. Typical examples are the boiling of eggs and the cooking of meat. When proteins denature they contract and become firmer. There are several helpful tables relating the doneness of different meats to temperature.
  • At around 70 °C (160 °F) collagen, the connective tissue in meat, turns into gelatin. As a result the meat becomes more tender, which is desireable in stews and other slow cooked meats.
  • Heat causes air/gas to expand and water to evaporate to give a foamy/airy texture. For example, experiments have shown that it is mainly the evaporation of water that causes a soufflé to rise.
  • Heat will cause certain hydrocolloids to solidify (for exaple methyl cellulose) whereas it will cause others to melt (such as gelatin).
  • Brining meat can greatly improve it’s texture and juicyness. This is done by immersing the meat in a 3-6% salt solution from anyhere between a few hours to two days before cooking.
  • Frozen water in the form of tiny ice crystals are important for the smooth texture of sorbets and ice cream. Ice cream that has been partly melted and frozen again will grow larger ice crystals that impart a coarser texture to the ice cream.
  • Acidic solutions (low pH) can cause proteins to denature. This allows fish to be cooked without the use of any heat. An example is the use of lime juice in ceviche.
  • Emulsifiers, thickeners and gelling agents have almost become synonymous with molecular gastronomy for many. They can greatly alter the texture of foods and typically only a very small amount is required. Where gelatin was the only gelling agent videly available to cooks in Europe and America only a decade ago, this has changed with the advent of many internet suppliers of speciality ingredients.
  • Cooking under vacuum can create new and exciting textures. First of all it’s a way of removing excess water without having to raise the temperature all the way up to 100 °C. When the water is removed, this will create pockets of air in the food, and when the pressure is released, the liquid surrounding the food that is prepared will rush in and fill these pockets. There is a commercially available vacuum cooker, but a DIY version can be made from a pressure cooker and a vacuum pump.

  • (Photo by Trinity at flickr.com)

  • Green leaf vegetables such as lettuce loose water upon storage. As the pressure inside the cells drops, the leaf becomes softer. By immersing the leaves in cold water for 15-30 min, thanks to osmosis, water will enter into the cells again. As the pressure increases, the leaves become crisper.
  • Air bubbles can greatly modify textures, and foams really are ubiquitious (which becomes obvious if you read the book “Universal foam - from cappuccino to the cosmos”). Ferran Adria’s espumas have become very popular, as has his recent invention, the Espesso. Air bubbles are also very important for the texture of ice cream, in fact ice cream is nearly 50% air (just consider the fact that ice cream is sold by volume, not by weight!).
  • A very recent addition to the modern kitchen pantry is the enzyme transglutaminase. The enzyme acts like a meat glue and Chadzilla has nice blog post on his transglutaminase experiments.
  • There are also enzymatic counterparts of transglutaminase available: proteolytic enzymes also known as proteases. You can find them in pineapple (bromelain/bromelin), papaya (papain), figs (ficin) and kiwi (actinidin) - and they are capable of degrading proteins and muscle tissue. Despite this, they have only found limited use in marinades, as their action can be difficult to control (as Nicholas Kurti experienced, look for the “But the crackling is superb” link).
  • When mixing flour and water, glutenin and gliadin react to form gluten which gives bread it’s elasticity and plasticity. Addition of 1-2% salt to bread tightens the gluten network and increases the volume of the finished loaf. Similarly, addition of 1% oil to the dough (after the first kneading) can further increase the volume. Larger amounts of fat added before kneading will interfere with the formation of long gluten strands, hence the name shortening.
  • The no-knead bread that recently hoovered around in the blogosphere challenges the conventional wisdom that bread needs kneading to get a good texture.
  • Once bread is baked, the staling process starts. Staling does not necessarily involve loss of water from the bread and is caused by crystallisation (or retrogradation) of starch. In this process water molecules are trapped. The process proceeds fastest at 14 °C, but is halted below -5 °C. This is the reason why bread should be stored at room temperature. The staling process can be slowed down by addition of an emulsifier such as lecithin which is abundant in egg yolk.
  • A way of turning high fat foods and oils into powders is by the use of tapioca maltodextrin. Hungry in Hogtown has shown how Nutella can be turned into a powder.
  • *

    Check out my previous blogpost for an overview of the tips for practical molecular gastronomy. The collection of books (favorite, molecular gastronomy, aroma/taste, reference/technique, food chemistry) and links (webresources, people/chefs/blogs, institutions, articles, audio/video) at khymos.org might also be of interest.

    “Dialogos de Cocina” with molecular gastronomy webcasts

    Tuesday, March 13th, 2007

    Dialogos de Cocina took place in San Sebastian, Spain, on March 12 and 13. Monday’s program featured a session on Technology, Technique and Science which should be of great interest to the molecular gastronomy community. The sessions have been made available as webcasts available in English, French and Spanish. Look out for the following topics:

    Monday, March 12

    16.00-16.30
    Other Ways of Thinking, Toni Massanes (Fundación Alicia).

    16.40-17.10
    Other Ways of Understanding, Antonio Duch (Fundación Azti).

    17.20-17.50
    Other Ways of Doing it, Harold McGee.

    18.00-18.30
    Other Ways of Seeing it, Davide Cassi.

    18:40-19:40
    What can Science Offer us in Addition to Techniques and Technology?,
    Round table discussion with Toni Massanes (Fundación Alicia), Antonio Duch (Fundación Azti), Harold Macgee (writer), Davide Cassi (scientist), Heston Blumenthal (chef).

    Update: Kate Hill at IACP (International Association of Culinary Professionals) has written an extensive report on the meeting.

    Simple temperature calculations

    Thursday, March 8th, 2007

    Although I recommend the use of a thermometer, sometimes it’s convenient to know how you can also manage without. If you mix water at two different (but known) temperatures, you can easily calculate the temperature after mixing. Just multiply the temperature of each part with the relative amount. For example, if you have 3 dL at 100 °C and 7 dL at 10 °C (which happens to be the approximate temperature of my tap water), this gives (3 dL x 100 °C + 7 dL x 10 °C) / 10 dL = 37 °C which is just perfect for dissolving fresh yeast when making bread.

    You can also do it the other way around. Let’s say you have boiling water and you know that your tap water is approximately 10 °C. If you want water at approximately 37 °C, you can do as follows:

    temperature-calculation.jpg

    Start by writing what you have to the left (100 °C and 10 °C) and what you want in the middle (37 °C). Subtract: (100-37) = 63 and (37-10) = 27. And voilá - you need 27 parts water at 100 °C and 63 parts at 10 °C (and 27:63 simplifies to 3:7 which is what we found above). Now of course if you really wanted water at 37 °C, you would simply put your finger in to see if it’s at body temperature…

    Are there any practical applications of this? Yes - a simple, but elegant way to prepare fish would be to drop a fish of known weight and temperature (fridge @ 4 °C or freezer @ -18 °C) into water that has been brought to boil. Cover pot and turn off heat. The amount of water would be calculated based on the desired temperature of the fish. We are assuming here that there is no heat loss to the surroundings, which of course isn’t quite true. How fast pot of water will cool depends on how much water you use and on the pot. This can be corrected for, and luckily someone has already done it. More on this in my post on how to cook fish in cooling water.

    We can apply the temperature calculation from above to figure out roughly what the temperature will with this cooking method. 800 g of fish from the fridge (4 °C) and 2,4 L of boiling water gives a temperature of (0,8 x 4 °C + 2,4 x 100 °C) / 3,2 = 76 °C. The cooling curves for a pot with 2,5 L of water suggest a temperature loss of 15-20 °C in 30 min which would bring us down to 55-60 °C which - considering that no thermometer is used - is quite good.

    Cooking fish in cooling water

    Thursday, March 8th, 2007

    I have previously written about how you can cook a perfect steak with a simple DIY sous vide technique. Of course low temperature cooking applies equally well to fish with the only difference that the temperature can be turned down even lower.

    A slightly different approach for cooking fish was presented by Haqvin Gyllensköld in the Swedish book “Koka, steka, blanda” from 1977, which I became aware of through Östen Dahlgren’s book “Laga mat - hur man gör och varför”. In stead of keeping the fish at a constant temperature (which requires quite some attention unless you have a thermostated waterbath), in this method, as the hot water cools, the temperature of the fish increases until they’re at the same temperature.

    This is how you do it:

    1. Weigh the fish
    2. Boil the triple amount of water
    3. Add some salt to the water (15 g / L)
    4. Put the fish in the water and remove the pot from the stove
    5. Check the graph below for how long the fish should be left in the cooling water
    6. Serve!

    cooking-fish-in-cooling-water.jpg

    Need help on fish names in different languages? Yeah, me too!

    Staying warm: Cast iron vs. stainless steel

    Thursday, March 1st, 2007

    Cookware made from cast iron has a reputation for keeping food warm for a long time. Is that really true? Best way to find out is by an experiment. I decided to compare a cast iron pot with one of stainless steel. These are the pots I used:

    cast-iron-stainless-steel.jpg

    For the first experiment I filled them each with 2,5 L of water, put the lids on and brought both to the boil and let them boil for a minute so the pot itself would be warm throughout. Then both were placed on cork plates and left to cool. The temperature probe was carefully inserted under the lid in order to reduce the heat loss, and removed once the temperature had stabilized. For the second experiment 5 L of water were used. The measured temperatures are shown in the graph.

    cooling-curve.jpg

    Contrary to what I had expected, the stainless steel pot keeps water warmer! After approximately 1,5 hours there is a 10 °C difference between the two. As expected, when using 5 L of water, it stays warm longer. Physical data for the two pots are given in the following table:

    Cast iron Stainless steel
    Volume 6 L 6 L
    Diameter 27,9 cm 25,0 cm
    Height 11,5 cm 14,5 cm
    Surface area
    (top+sides)
    1619 cm2 1629 cm2
    Surface area
    in contact with 5 L water
    1301 cm2 1286 cm2
    Weight 6,1 kg 2,3 kg
    Wall thickness ~4 mm <1 mm
    Heat capacity of pan 2,8 kJ/K 1,2 kJ/K
    Thermal conductivity 80 Wm-1K-1 16 Wm-1K-1
    Thermal diffusivity 22 x 10-6 m2/s 4.3 x 10⁻⁶ m2/s
    Emissivity 0.95 0.07

    The heat capacity of the cast iron pot is more than double that of the stainless steel pot. But this is negligible compared to the heat capacity of water: 10.5 kJ/K (2,5 L) and 20,9 kJ/K (5,0 L). Also, there is only a small difference in their surface area which cannot explain the large difference in temperature loss observed.

    This leaves me with two eplanations:

  • Cast iron is better heat conductor and has a higer thermal diffusivity
  • Cast iron (being nearly black) has a much higher emissivity than a polished stainless steel surface. The reason for this is that absorption and reflection of radiation are related.
  • My guess is that the difference in emissivity is more important (but please correct me if I’m wrong). With an infrared thermometer, one should therefore be able to measure a difference between pots of cast iron and polished stainless steel (even though they’re at the same temperature!) due to the difference in emissivity. Any one who can do the experiment and report back?

    Conclusion: There are many good reasons to use cast iron, but keeping food warm is not one of them!

    TGIF: Molecular chocolate

    Thursday, March 1st, 2007

    chocolate-theobromine.jpg

    When eating this chocolate, you eat a molecular model of what you are eating (well, at least one of it’s components) - theobromine!

    It’s the brainchild of two Belgians, chocolatier Pierre Marcolini and furniture designer Dirk Meylaerts. More info on the Belgian and US website.

    The taste scheme used for the different elements does not seem to be quite consistent (i.e. each element represented by a unique color):

  • Carbon: matte brown (crunchy shell)
  • Nitrogen: golden (mixture of caramel, roasted pineapple and praline) + bronze (bitter ganache with gingerbread notes)
  • Hydrogen: white (milk chocolate ganache flavoured with raz-el-hanout, sheathed in white chocolate) + bronze (bitter ganache with gingerbread notes)
  • Oxygen: shiny dark brown (blend of chocolate and caramel ganache with a touch of tonka bean)
  • chocolate-theobromine-assigned.jpg

    [Via Inkling Magazine]