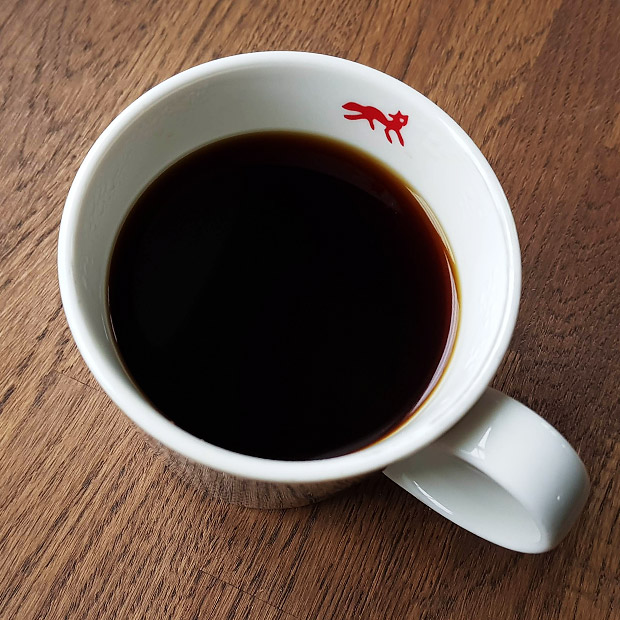
Archive for the ‘flavor pairing’ Category

TGRWT #10: Pizza with blue cheese and pineapple

Tuesday, March 25th, 2008

pizza-stone-art.jpg
This piece of art was recently sold at an auction for $ 35 million USD! No … just kidding. Read on to find out more!

For the 10th round of TGRWT I decided to modify one of my favorite pizza recipes. As it already has some blue cheese I decided that I would just add som pineapple to the sauce and see how that would work out. Knowing that pineapple works quite well on pizza (at least I have childhood memories from a pizza place called “Aloha” where they served a “Hawaiian delight” pizza with pineapple, ham and cheese) I was quite optimistic about this combination.

pizza-close-up.jpg

Normally I don’t use a recipe for the dough. I only remember to use 1 dL water per person. Everything else is added ad lib. But to give you a proper recipe I measured all the ingredients. Using 4 dL water gives approximately 1 kg dough in total. This gives 3 pizzas with a diameter of about 26 cm, serving 3-4 people. If you like you can roll the dough out thinner and make 4 pizzas and stretch the sauce and toppings correspondingly.

pizza-rising-dough.jpg

Pizza dough
4 dL water
5 g salt
5 g fresh yeast
580 g flour (plain white)
20 g olive oil

Add salt and yeast to luke warm water (~37 °C) and stir to dissolve yeast. Add flour in portions, reserving about 40 g. Mix/knead well for a couple of minutes. The dough is quite sticky. Add the olive oil. Mix/knead more. Add the remaining flour and fold the dough a couple of times. Cover and let rise for 1-2 hours.

Addition of 2% oil helps to give a lighter texture. But mix/knead the dough first so you form the gluten network before you add the oil. Otherwise the oil will cover the glutenin and gliadin proteins and inhibit the formation of gluten, rendering the dough less elastic.

pizza-sauce-bluecheese.jpg

Pizza sauce
45 g sardines (I used King Oscar “Mediterranean style”)
3 t capers
2 T tomatoe paste
1 clove garlic
4 pineapple rings

Mix everything in a small food processor. (You can also add some olives if you like.)

Blue cheese sauce
75 g blue cheese
75 g crème fraîche

Crumble the blue cheese, add the crème fraîche and mix until smooth.

Toppings
1-2 onions, in rings
50 g pepperoni
100 g cheddar, grated

Assemble the pizza as follows. Roll out approximately 330 g dough and place it on a suitable pizza peel (if you forget this you won’t be able to transfer the pizza to the baking stone). Add pizza sauce, blue cheese sauce, onion rings, pepperoni and cheddar cheese. Transfer to a preheated pizza stone and bake at 250-300 °C until nicely browned. Depending on temperature this typically takes around 5-10 min.

pizza-animated.gif

The key to a good pizza is turning up the heat! I usually set my oven around 250 °C, but you can go even higher if you like. Secondly you want to use a pizza stone (also known as a baking stone) to get that nice oven spring and a crisp crust. The picture at the top of this blog post is just a close up of my pizza stone! The black speckles are the carbonized remains of cheese and pizza sauce. I’ve blogged about the science of pizza stones previously:

A baking stone is made from a porous ceramic material. It’s heat capacity is good (much higher than that of a metal plate/sheet) and as a result, when the cold dough is placed on the baking stone, it still has enough heat to make the pizza rise immediately. Secondly, the fact that the baking stone is porous lets it absorb moisture from the pizza. This is what gives the nice crisp crust as it transports moisture away from the pizza.

pizza-stone.jpg

Verdict:
The original version of this pizza (without pineapple) is one of my absolute favorites and tinkering a little with the recipe doesn’t change this. But even so I felt that the pineapple diluted the pizza sauce and that the sweetness took away too much of the saltiness of the pizza sauce. Unfortunately, when making the pizza sauce, I discovered that my tube of tomato paste was empty so I used ketchup in stead. In retrospect I see that this wasn’t a good choice as ketchup is quite sweet. Therefore it’s not fair to say that all the extra sweetness came from the pineapple, but it nevertheless contributed with a lot of sweetness.

The overall flavor was very nice though, and my wife thought this pizza was better. Personally however I prefer the “original”. But perhaps next time I’ll try to add pineapple chunks in stead of churning it together with the sauce so as to concentrate the pineapple flavour more and allow it to come in small “flavor packs” now and then. I think that might work better.

pizza-wine-closeup.jpg
Serve with red wine and a fresh salad!

TGRWT #9: Chocolate tagliatelle with parmesan cream

Monday, February 25th, 2008

chocolate-pasta-5.jpg
Chocolate pasta suspended for drying.

For this round of TGRWT I decided to use the recipe (Chocolate Carbonara with Parmigiano Reggiano Cream and a Chocolate-Dipped Grissini Wrapped in Prosciutto di Parma) by Masaharu Morimoto which I’ve blogged about previously. I was quite intrigued by that recipe and wanted to try it! So here it is, converted to metric units with some small adjustments. The original recipe called for 4 eggs, but this rendered the pasta dough to hard. I added two of the whites which were left over from the sauce. BTW this is why one of should better weigh out eggs instead of count them (too bad I didn’t think about his from the beginning so I could have weighed the eggs I used). The original recipe called for bread sticks with chocolate and prosciutto di Parma which I skipped (but which nonetheless sounds like a good accompaniment - as you’re probably aware of meat and chocolate also go very well together!).

(more…)

Ten tips for practical molecular gastronomy, part 8

Sunday, February 3rd, 2008

balancing-forks-tall.jpg
Read about the physics behind the balancing fork trick.

8. Experiment!

Dare to experiment and try new ingredients and procedures. Do control experiments so you can compare results. When evaluating the outcome, be aware that your own opinions will be biased. Have a friend help you perform a blind comparison, or even better a triangle test to evaluate the outcome of your experiments.

In a scientific context, an experiment is a set of actions and observations performed in the context of solving a particular problem, in order to support or falsify a research hypothesis. In a kitchen context, the problem to solve would typically be related to taste, aroma, texture or color. And the required actions and observations would be cooking and eating.

An essential part of the scientific method is that new knowledge is gained when, based previous knowledge, an assumption is made and tested. In the kitchen, this is exactly what you do when you taste your concoctions repeatedly as you cook. And it is also what makes you an experienced cook, because you remember and learn from your previous successes and mistakes. It might sound very complicated, but here’s how it goes:

1) Observation: soup lacks flavor
2) Hypothesis: adding something with flavor might help
3) Experiment: add more spices
4) New observation: soup tastes more (or less)
5) Hypothesis is either supported (or rejected)

Of these steps, I think observation is the easiest. Coming up with a hypothesis however can sometimes be difficult. If you have lumps in your custard or a sauce that’s separating, it isn’t always easy to think of what to do. This is where books on popular food science and molecular gastronomy might help you.

balancing-forks-1.jpg

Think outside the cook book! I mentioned in previous post that you should always question authorities and cook books. And even when you have a recipe that works, remember that it’s nothing more than a suggestion. For instance, it can be useful to know when to be sloppy and when to be accurate with measurements. The smaller amount you measure, the greater the precision should be. Let’s consider a hypothetical recipe that calls for 1000 g flour and 1 g of saffron. Whether you use 999 or 1001 g of flour makes no difference, but using 1 or 2 g of saffron will be quite noticable. A good rule of thumb is that you should measure to within +/- 10% of the given amount. But again, don’t follow this blindly. Experience will show when you can be even more sloppy.

Thinking of good experiments to do requires both creativity and experience, and there are many sources of inspiration. The molecular gastronomy movement has come up with a number of books and blogs which point towards new ingredients and procedures. There are several approaches to flavor pairing (i.e. a general one based on experience and a chemical one based on impact odorants). Further more there’s a lot of inspiration to get from regional cooking - also for molecular gastronomists! Lastly, I think considering not only the food but the whole atmosphere and the setting of the meal is important, because our senses are connected!

balancing-forks-2.jpg

The best way to judge the outcome of a new procedure or ingredient is to compare it with the original. I’ve previously termed this “parallel cooking”. In scientific contexts it’s very common to do control experiments and I can’t see why this shouldn’t be done in the kitchen routinely. Im convinced that this could have saved us from many kitchen myths!

Once you’ve done your parallel cooking, you have to taste it. If you did the cooking, you’ll probably have an opnion or expectation that the new dish is better or worse than the original. The big problem here is that due to confirmation bias, if you know what you are eating, this will influence your perception of it. Therefore it’s crucial to do a blind tasting (or a double-blind tasting). Have friend help you label each dish with random three digit numbers (to avoid thinking about ranking) and give them to you. If the dishes can easily be recognized due to color, it’s important that the lights are turned down or that you are blindfolded. State which dish you prefer and have your friend reveal the identity of the dishes tasted.

A slightly more sophisticated test is the triangle test which is commonly used in the food industry. The tester is presented with three samples of which two are identical and the task is to pick the odd one out. Using statistics, it’s possible to evaluate the outcome of repeated tests. The number of correct assignments in a number of triangle tests required for you to be 95% sure there is a difference are given in the table below. Read more about simple difference tests here.

Number of tests performed Number of correct assignments required
3 3
4 4
5 4
6 5
7 5
8 6
9 6
10 7

Bionomial distribution for a triangle test (p=1/3) at 0.05 probability level. A more extensive table can be found here.

It seems that this would be the ultimate way to determine whether or not there is a difference between pepsi and coke. It’s more than 50 years since the first experiments were conducted. The theory is simple, but in the real world things aren’t always that simple. Read the entertaining story about Fizzy logic.

balancing-forks-3.jpg

There are several examples of experimental cooking out on the net, and I thought I’d share some of them with you as this might illustrate my ideas on the subject.

Many cooks have strong opinions about how garlic should be treated. Should it be minced, crushed or microplaned? And does this really influence the taste and aroma? Or does it only affect the degree of extraction and hence the intensity of the flavor? Dominic of Skillet Doux had a excellent post on this subject in 2006, Deconstructing garlic. The task was formulated as follows:

The subject of this experiment is the effect that various methods of breaking down garlic have on its flavor when used to prepare a dish. The hypothesis is that not only does mincing garlic create a different flavor than crushing it, but also that mincing is the preferred method for pasta sauces. Furthermore, the experiment is intended to determine if microplaning garlic achieves a character different from mincing or crushing.

In his conclusion, Dominic writes ” I was surprised to discover that the difference between the minced and crushed garlic sauces was even more significant than I had previously thought”. Check out his post to find out which kind of garlic treatment he prefers for his pasta sauces. As a side comment it can be mentioned that a group of researchers in 2007 studied the effect of cooking on garlics ability to inhibit aggregation of blood platelets. They found that crushing could reduce the loss of activity upon heating. But unfortunately they didn’t report anything about the flavor.

Other food bloggers have also adopted experimental cooking with emphasis on systematic and thorough testing. Examples include Chad’s experiments with gellan, konjac and iota/kappa carrageenans, Michael Chu’s parallell cooking of bacon and his eggplant test and Papin’s comparison of orange juices - to mention but a few! And I shouldn’t forget Dylan Stiles either whom I mentioned in part 5 of this series:

A challenge with aroma molecules is that they should remain intact during storage and not be released until cooking (or even better, until consumption). A example would be to install a Liebieg condenser over your pot. Dylan Stiles has explored this in his column Bench Monkey by placing a bag of ice on top of the lid. He claims that his roommates preferred the curry which has been cooked under “reflux conditions”. The study was performed in a double blind manner (which I will come back to in part 8 of this series).

An extreme example of the application of the scientific method to cooking appeared in the news last spring when the recipe for the ultimate bacon buttie was revealed by scientists from Leeds University. Commissioned by Danish Bacon, the study evaluated more than 700 variations of a bacon buttie. They even came up with a “formula” for the perfect bacon buttie and quantified the required crispiness and crunchiness. The news story was picked up by many news agencies, so although it wasn’t necessarily ground breaking science, at least it was clever marketing.

*

Check out my previous blogpost for an overview of the 10 tips for practical molecular gastronomy series. The collection of books (favorite, molecular gastronomy, aroma/taste, reference/technique, food chemistry, presentation/photography) and links (webresources, people/chefs/blogs, institutions, articles, audio/video) at khymos.org might also be of interest.

TGRWT #8: White chocolate soufflé with caviar

Wednesday, January 30th, 2008

white-chocolate-caviar-2.jpg

As a late (but just in time for the deadline) response to TGRWT #8 which was announced by Chadzilla in December last year - here is finally my write up on a recipe and a little on the background of this flavor combination which has become a classic in molecular gastronomy.

Heston Blumenthal introduced it around 2002 at The Fat Duck. It’s well worth reading what Heston wrote about this combination back then. He describes how salt can help bring out the flavor of many desserts. At one point he tried caviar and white chocolate - the effect was stunning. He then wanted to find out why this combination was so successful:

I gave some caviar and chocolate to François Benzi, who works for Firmenich, the flavourings and perfumes company based in Geneva. He was so surprised at the way that the caviar and chocolate melded together that he excused himself for half an hour while he tried to discover the reason behind the success of this union.

When he returned, the response was that both the chocolate and caviar contain high levels of amines. These are a group of proteins that have broken down from their amino acid state but not so far as to become ammonia. Amines contribute to the desirable flavours that we find in cooked meats and cheeses, among other things.

Some might object to using caviar but remember that there is no need to turn to sturgeon caviar as this species is endangered. I used caviar from Capelin which costs less than $4/€3 for a box of 50 g. As I have never tasted the “real” stuff I’m not the right person to judge about similarity or difference in aroma. And in case you also wondered about the terminology - roe is the fully ripe egg masses of fish whereas caviar refers to processed, salted roe. I decided to make a soufflé and based the recipe loosely on one of the soufflé recipes in my Larousse Gastronomique.

white-chocolate-caviar-3.jpg

White chocolate soufflé with caviar
40 g white chocolate
30 g flour
1 dL milk
35 g caviar
3 eggs, separated
nutmeg

Melt chocolate on very low heat. Add 1/3 of the flour and stir, heating gently. Add a 1/3 of the milk and mix thoroughly. Add another 1/3 of the flour, then more milk and so on. Add finely ground nutmeg. Add 3 egg yolks and heat until right before the mixture sets (yeah - I admit - this is not very precise…). Then add the caviar. Beat egg whites stiff and fold them in. Pour into greased soufflé dish and bake at 220 °C for about 15 min.

Verdict: Aromas blend well together, but when eaten alone it’s perhaps a little bland. But I’m quite sure that it could be succesfully incorporated into a menu together with something acidic. The texture was nice, but the soufflé quickly falls together once it’s removed from the oven (I’ll have to post more on the chemistry of soufflés some other time - Hervé This has written a lot about this).

If you try to make this - note that white chocolate doesn’t behave excately like butter when you add the flour. It all got very thick, very fast - that’s why I started adding milk early. I also guess you have to be really careful when heating the whtie chocolate, but I didn’t do any stress tests here.

white-chocolate-caviar-1.jpg
This is what the mix looks like before I folded in the egg whites.

For my first attempt at this recipe I used 20 g flour and 15 g caviar. The result was that the caviar sedimented before the soufflé had set, besides the fact that one could hardly taste the caviar at all. On my second attempt however, there was enough flour to keep the caviar suspended until the soufflé set. And one could actually also taste the caviar.

white-chocolate-caviar-4.jpg

And now on to the chemistry behind:
I promised that I would come back with more information about the chemistry behind this pairing, but there isn’t very much information out there. There is one paper on aroma development in block-milk which used in the production of white chocolate. This paper lists a couple of volatiles, but only with their relative peak areas. Turning to caviar (or roe), there is a recent paper on flavor characterization of ripened cod roe, and this paper includes qualitative information about odor intensity.

Comparing the list of volatiles, the following volatiles which contribute substantially to the odor of ripened cod roe are also found in block milk (followed by odor thresholds in water, given in ppb, taken from this page):

2-butanone (50000 ppb)
2-methylbutanal (1 ppb)
3-methylbutanal (0.2-2 ppb)
pentanal (na)

Of these, the first has a high odor threshold, so it’s not likely to be an impact odorant in block-milk (and white chocolate). The methylbutanals however probably contribute to the overlapping aroma of roe and white chocolate. I didn’t find any threshold value for pentanal.

One group of compounds which was not mentioned in the paper on cod roe odor from 2004, but which was mentioned in a Russian paper from 1967 are amines (Golovnya: “Gas-chromatographic analysis of amines in volatile substances of salmon caviar”). Considering the fact that trimethylamine has a threshold in the range of 0.37-1.06 ppb, and that trimethylamine is found in block-milk suggests that it might contribute significantly to the odor of both white chocolate and roe. I guess the reason trimethylamine (and the whole range of other, closely related amines) is not found in the odor analysis in the 2004 paper has to do with the analytical method used.

The fact that amines are crucial is further supported by the Guardian article I quoted from in the beginning where Heston Blumenthal describes how he turned to François Benzi, a flavor chemist at Firmenich, to find out why white chocolate and caviar is such a good match. Benzi concludes that it is due to the presence of similar amines in white chocolate and caviar.

Foodpairing website launched

Thursday, November 22nd, 2007

foodpairing.jpg

The long awaited website on foodpairings has now been launched, and they’ve also registred the corresponding blogspot name (which isn’t online yet as of today). The beautiful photos, great design and easy maneuvering makes it an excellent place to start if you are looking for some new and perhaps surprising combinations of foods. The foods are grouped into categories such as cocoa (?), dairy, fruits, meat, sea food and vegetables. One of the vegetables listed is cauliflower, and clicking it reveals that the topic of TGRWT #7 (caramelized cauliflower and cocoa) is one of several possible combinations. This is how it is displayed (an important detail is that the shorter the distance between the names, the more flavours they have in common):

foodpairing-cauliflower.jpg
(click to open the full picture from the foodpairing.be site)

As an added bonus interchangeable herbs and spices are also listed. This is how it works:

A food product has a specific flavour because of a combination of different flavours. Like basil taste like basil because of the combination of linalool, estragol, …. So if I want to reconstruct the basil flavour without using any basil, you have to search for a combination of other food products where one contains linalool (like coriander), one contains estragol (like tarragon),… So I can reconstruct basil by combining coriander, tarragon, cloves, laurel. The way to use it is to take from each branch of the plot one product and make a combination of those food products.

It should be noted that the proximity of the foods in the diagrams is based on the number of volatile compounds they have in common, not the actual key odorants. As I have elaborated on previously, pairings like these should preferably be based on odor activity values (OAV). Or to put it differently, if the volatiles shared by two foods are not the ones that actually contribute to the overall flavor, there is no reason to expect that they go well together from a chemical perspective (which is not to say that they won’t match, only that if they do, it is for some other reason). This is a limitation both of the foodpairing site, but of course also of the food blogging event They Go Really Well Together (or TGRWT) which I have initiated. Having said this, I still believe that the foodpairing site is an excellent place to start, especially if you like to improvise in the kitchen. I sincerely believe that the site will spark the creativity both of professional and amateur cooks (just like TGRWT already has)! I should add that the website is set up by the people behind Food for Design, so no wonder it looks so good!

TGRWT #7: Cocoa frico with cauliflower cream

Sunday, October 28th, 2007

cauliflower-cocoa-8.jpg

For this month’s TGRWT I wanted to make a cauliflower cream and serve it with something crispy. Considering the fact that cocoa and parmesan are also a good match I googled for parmesan crisps and found a nice recipe for “frico” - Italian parmesan crisps. The cauliflower cream was invented in the process of making it.

Cocoa frico
40 g parmesan, grated
2 t cocoa

Mix parmesan and cocoa. Divide into six portions on a parchment paper (use cake rings with a diameter of approx 9 cm). Bake for 4 min at 175 °C. Leave to cool. If made to thick, the fricos will be chewy rather than crispy.

cauliflower-cocoa-3.jpg
Grate parmesan and mix with cocoa.

cauliflower-cocoa-4.jpg
Transfer to parchment paper.

cauliflower-cocoa-5.jpg
After baking the fricos look like this - let them cool for a couple of minutes before handle them.

cauliflower-cocoa-6.jpg
If you want to make “baskets”, invert them over a wine cork or something similar.

Cauliflower cream
1/2 cauliflower, in slices
2.5 dL water
1.5 dL sour cream
2 t salt
1 t xanthan

Cut cauliflower in pieces and spread on aluminum foil. Bake for 40 min at 175 °C. Add water to cauliflower and pureé with immersion blender until smooth. Add sour cream, salt and xanthan and blend. Pass through a fine sieve and transfer to a 1/2 L whipper and charge with nitrous oxide. Note: To use up this portion of cauliflower cream makes you’ll have to make 20-30 cocoa fricos!

cauliflower-cocoa-2.jpg
Caramelized cauliflower with nicely browned edges.

To serve, place frico on plate, fill with cauliflower cream and sprinkle with pepper.
cauliflower-cocoa-7.jpg
The baskets were a little to large to grab, and impractical to eat with a knife and a fork. The flat half-moon pictured at the top of this post was easier to eat just using the fingers.

Verdict: A nice appetizer! Fricos have a strong parmesan flavour with a hint of cocoa. Aromas blend well, but the dish could need some kind of freshness added to it - Any suggestions?

TGRWT #7: Caramelized cauliflower and cocoa

Sunday, October 7th, 2007

tgrwt-7.png

Get ready for the next round of TGRWT! The seventh round is hosted by Papin at Flavor alchemy who chose to pair caramlized cauliflower and cocoa. An easy way to caramelize cauliflower is to cut it in 2 cm thick slices (many of them will fall apart - that’s OK) and bake them at 200 °C for approx. 30 min. You can sprinkle the pieces with olive oil and salt, but this is not absolutely necessary.

cauliflower-cocoa-jelly.jpg

It is a truly delicious combination, and I’ve published a simplified recipe for caramelized cauliflower and cocoa jelly, based on a recipe published by Heston Blumenthal. What is fascinating about the combination is that after I’ve tasted the two together, caramelized cauliflower on it’s own reminds me of cocoa.

For an extra boost of inspiration, visit Inge’s round-up of TGRWT #6 (part 1, part 2) which featured many delicious combinations of apple and lavender.

TGRWT #6: Applecake (with too little lavender)

Sunday, September 30th, 2007

apple-lavender-cake.jpg

In the last minutes of the TGRWT #6 I decided to make a simple apple cake and add some lavender. The cake was nice, but I could clearly have used much more lavender. This makes me curious about what experiences the rest of you have made combining apple and lavender.

Apple cake (with too little lavender)
100 g butter
170 g sugar
rind of 1/2 lemon
4 eggs (~210 g)
275 g flour
1 t baking powder
1 dL milk (or cream)
ca. 20 lavender leaves
3-4 apples, thinly sliced
3-4 t sugar

Mix butter and sugar. Add eggs and lemon rind. Mix flour and baking powder and add to the rest. Stir in milk and add lavender. I used leaves for the batter and ca. 15 to decorate the top. Pour batter into greased pan. Insert apple slices. Sprinkle with sugar. Bake at 175 °C for 45-55 min until golden. Cool. Serve with whipped cream.

TGRWT #6: Apple and lavender

Wednesday, September 5th, 2007

tgrwt-6.png

TGRWT #6 is hosted by Inge over at Vanielje Kitchen (which BTW features a separate blog with recipes only). Deadline is October 1st and the foods to pair this time are apple and lavender. For other details - check out her post. In case you haven’t done so yet, check out Amrita’s excellent round-up of TGRWT #5 which was on chocolate and meat.

Unfortunately I don’t have any odour activity values for the apple/lavender combo, but a search at The Good Scents Company suggests there are several compounds which are found in or used with the two.

TGRWT #5: Grilled pork tenderloin with chocholate beef stock cream

Sunday, August 26th, 2007

chocolate-beef-stock-cream.jpg

This month’s TGRWT is hosted by Le Petite Boulanger, and the foods to pair are chocolate and meat. The recipe for the chocolate beef stock cream is inspired by the Iberian Ham Cream by Ferran Adrià/El Bulli (the recipe can be found on p. 21 in the hydrocolloid recipe collection). I used anis because it brings out the meatiness very well. After mixing in the olive oil I saw that the droplets were not properly dispersed. Addition of some lecithin which solved this problem.

Chocolate beef stock cream
100 g water
2 g beef stock powder
10 g chocolate (70%)
1/4 t anis, powdered
0.5 g xanthan
0.2 g lecithin
20 g olive oil
honey and chili oil to taste

Heat water to dilute beef stock and melt chocolate. Cool. Add xanthan and lecithin. Mix with immersion blender. Add olive oil. Mix until smooth texture. Sprinkle with chives.

Grilled pork tenderloin
pork tenderloin, cut in 3 cm thick pieces
oil
powdered anis
crushed garlic

Marinate meat with oil, garlic and anis mixture. Grill. Serve together with the chocolate meat broth cream.

pork-chocolate-beef-stock-cream.jpg

Verdict: The chocolate beef stock cream has very meaty and almost nutty flavour. Honey is important to round of the otherwise slightly bitter taste of the chocolate. Chili oil gives it a bite, but can be omitted.

You can get an impression of the texture from this video:

TGRWT #5: Chocolate and meat

Sunday, August 5th, 2007

tgrwt-5.png

Amrita of Le Petite Boulanger has announced the foods to pair for the fifth round: chocolate and meat! And in case you didn’t notice, Dennis has written an excellent summary of the mustard-mint recipes of round four.

I was not able to figure out which odorants actually formed the basis for the mustard-mint pairing (and perhaps there is none… as I’ve touched upon before, some of the data is hard to come at so it’s difficult to check all the entries of my compiled list). At M’s blog however you can find more info on the cold receptors which are triggered by both mint and mustard.

Fortunately data for chocolate and meat is available: odor activity values for cocoa and flavour dilution values for boiled beef and roasted beef. All flavour compounds were ranked and compounds given the same color coding as before. As you can see, there is considerable overlap between chocolate and meat.

chocolate-meat-pairing.png
(click to enlarge)

And here’s what the molecules that are found both in cocoa and beef look like. Notice that this pairing is dominated by furanones and pyrazines. The molecules are ranked according the the odor activity values in cocoa.

chocolate-meat-molecules.png

TGRWT #4: Trout with peppermint and mustard sauce

Thursday, July 26th, 2007

My first idea for this month’s TGRWT was to marinate some meat with mustard, peppermint and garlic. The meat was OK, but it wasn’t great and the flavors didn’t really come through. There was either something missing or the balance was wrong. I also suspect that the mint flavor is not very well suited for BBQ’ing.

peppermint-mustard-marinade.jpg
The peppermint mustard marinade didn’t work out quite as expected.

Instead of tinkering more with the marinade I decided to google mint and mustard and found a recipe from the blog Beyond Salmon which I modified slightly:

Peppermint and mustard sauce
6 T sour cream
2 T mustard (coarse type)
1 T brandy/cognac
1 T white wine vinegar
1-2 T coarsly chopped fresh peppermint
1-2 t sugar
1-2 t worcestershire sauce
salt
pepper

Mix all ingredients. The amounts are quite approximate, all spices should be added to taste.

peppermint-mustard.jpg

I served the sauce with oven grilled trout fillets, rice and steamed broccoli. The fish is easily prepared: Lay out the fillets in an oven proof tray, brushed with olive oil and maple syrup, sprinkled with salt and pepper and grilled for approximately 6-8 min at 200 °C (depending on thickness). Use thermometer if desired and aim at a core temperature of 45-50 °C.

Verdict: The sauce has a fresh, light tartness. Peppermint and mustard compliment each other very well. All in all a very delicate sauce. I wish I had made some more!

peppermint-leaf.jpg
Peppermint leaf in the rain, seconds before it was harvested for the sauce.

TGRWT #4: Mint and mustard

Thursday, July 5th, 2007

tgrwt-4.png

I just wanted to let you all know that Dennis at Kookjegek will be hosting the next round of “They go really well together” (TGRWT #4). Deadline for submission is August 1st. Ingredients to pair this time are mint and mustard. Also, do check out Evelin’s excellent round-up of TGRWT #3 which featured strawberries and coriander.

Banana marshmallows with parsley (v 1.5)

Saturday, June 23rd, 2007

parsley-fresh-dried.jpg

For TGRWT #2 I made banana marshmallows with parsley. The texture came out nice, but the initially fresh parsley flavour had become grassy/hay-like over night. The litterature I referred to last time suggested that the off-flavour is produced by oxidation of unsaturated fatty acids or polyenes. There are several strategies to avoid this. The first would be not to mince the parsley as finely as I did last time to avoid exposure to the air’s oxygen. If the oxidation is enzymatic, blanching would be helpful. And it would also be worthwhile to see if addition of lemon juice (vitamin C and citric acid, are both antioxidants) would have any effect (however, on second thought this would be strange since parsley already has a lot of vitamin C!). Mirko Junge commented last time that freeze dried parsley would possibly retain more of the freshness and he most generously provided me with several samples of freeze dried parsley. I decided to proceed with the following six types of parsley for my marshmallows:

  1. fresh parsley leaves, chopped to pieces of about 2-3 mm (picture above, left)
  2. parsley leaves, blanched for 30 sec, chopped to pieces of about 2-3 mm
  3. parsley leaves, sprinkled with lemon jucie, chopped to pieces of about 2-3 mm
  4. parsley leaves, blached for 30 sec, sprinkled with lemon juice, chopped to pieces of about 2-3 mm
  5. freeze dried parsley from Goutess (picture above, right)
  6. plain, dried parsley from my local store (picture above, front)

I used the same recipe as last time, but split the whipped sugar-gelatin-banana mixture into six different bowls before mixing with the parsley. I used approximately 0.6-0.8 g of fresh parsley for each of the entries 1-4. I tried to estimate the amount of dried parsley to use by eye, comparing with the amount of fresh leaves. The amount of dried parsley used was less than 0.1 g, so my balance was not of much help. The picture below might give you an idea.

parsley-six-bowls.jpg
Six different types of parsley were prepared immediately prior to mixing with the marshmallow base to minimize oxidation.

marshmallow-six-bowls.jpg
If the term ‘parallel cooking’ has not been invented yet, this might be good time to introduce it.

parchment-paper-marshmallow.jpg
I let the marhsmallows set between two sheets of greased parchment paper.

banana-parsley-marshmallow-tasting.jpg
Blind tasting of banana parsley marshmallows.

My wife helped me do a blind tasting to avoid any bias. The six marshmallow samples were each associated with a three digit code and presented on a plate to the taster. We both did two rounds each (A1/A2 and B1/B2) and the results are summarised in the table below. The scoring only describes the parsley flavour unless otherwise noted.

Parsley used A1 A2 B1 B2 Sum
Fresh parsley 5 5 5 5 20
Blanched parsley 4/* 1 2/* 2 9
Parlsey with lemon juice 0 1 5 5 11
Blanched parsley with lemon juice 1 0/* 2/- 0/- 3
Freeze dried parsley 4 2 2 2 10
Dried parsley 0/- 0/- 0 2 2

Legend:
5 fresh parsley, strong
4 fresh parsley, weak
2 grassy/hay-like parsley, weak
1 grassy/hay-like parsley, strong
0 neither fresh nor grassy, weak overall
- disagreeable
* banana dominates

I was quite surprised once I had decoded the score sheets. Fresh parsley cut into relatively large pieces gave a parsley flavour without any hints of grassy or hay-like off flavours! Blanching or treatment with lemon juice were both detrimental to the parsley flavour, and even more so when combined. The variation observed for could be a result of an uneven distribution of the parsley in the marshmallow (increased parsley flavour if you happen to chew a leaf). The freeze dried parsley didn’t do very well compared with fresh parsley, but outperformed the dried parsley from my local store which didn’t have much flavour at all. Both samples of dried parsley however were dominated by a grassy/hay-like flavour. I should add that the grassy/hay-like flavour in itself is not especially disagreeable, but it does not go very well together with the banana.

The result is interesting and perhaps a little counter intuitive. Generally one would say that a larger surface area (= finely chopped) would enhance the flavour release. This experiment however shows that this is not universally true, especially if the flavours can be oxidized. So next time you make banana parsley marshmallows remember that less chopping gives better parsley flavour.

TGRWT #3: Foamy strawberries with coriander

Sunday, June 17th, 2007

strawberry-coriander-icecream.jpg

Previously I had only tasted sliced strawberries with a fresh coriander leaf, just as a very basic illustration of this pairing. I must say I liked the combination, even though it’s dominated by coriander (or cilantro as it’s called in North America). But I figured that once the strawberries are processed into a dish, one would probably have to reduced the amount of coriander, so I did quite a lot of tasting as I proceeded with this combination for the third round of “They go really well together” (previous rounds: TGRWT #1, TGRWT #2). And I was surprised how well the coriander came through, even when using as little as 0.5 g! So start with a small amount of coriander if you decide to try this. Several have commented that they’re not to fond of coriander or the strawberry/coriander combo, and I wonder if this could be because they used too much coriander?

Anyway, I decided to go for a warm strawberry foam and be carefull with the amount of coriander. I started out without sugar, but found that sugar was essential for the strawberry coriander pairing (unless I would have taken it all in a savory direction like M did). Balsamico vinegar emphasizes the strawberry aroma and adds acid which I find important. If you plan to prepare this dish, I would suggest to add coriander, sugar and vinegar a little at a time, just to make sure it fits your taste.

Foamy strawberries with coriander and balsamic vinegar
200 g strawberries
0.5 g fresh coriander leaves
30 g sugar
14 g balsamic vinegar
150 g water
1 g xanthan

Make a purée of strawberries, coriander, sugar and balsamic vinegar with an immersion blender. In a separate container, mix water and xanthan using the same blender and add to the strawberry mix. Xanthan gives a viscous solution and helps retain the bubbles. The nice thing with xanthan is that it dissolves in cold liquid and requires no heating, but is stable at higher temperatures if you should want to heat the mixture. The immersion blender can be used to whip in some air, but for an even more airy texture, use an ISI whipper (many models available: cream, easy, gourmet, dessert, thermo) and charge with a cream charge (N2O). Important: you must filter out ALL the small stones from the strawberries using a cheese cloth or a towel, before transfering the mixture to the whipper, as these will clog the nozzle of the wipper (mine got clogged!). For a warm foam, heat the whipper in a water bath at 60-70 °C, but only do this if you have the ISI gourmet or thermo whippers which are designed for higher temperatures.

strawberry-coriander.jpg

Verdict: I was very satisfied and my wife liked it too! There’s a good balance between the strawberry and coriander aroma. Sugar rounds of the taste and the balsamic vinegar balances the sugar with it’s tangyness. I served the foam warm together with plain vanilla ice cream - delicious! At room temperature the sugar/acid balance was perfect according to my taste, but when served warm the foam was perhaps a little on the sweet side (which comes as no surprise as sweetness decreases when lowering the temperature).

strawberry-coriander-foam-closeup.jpg
Closeup of a larger air bubble below the surface! Who can resist to taste this?